Your Nuances controller doesn’t need any driver.
Just plug it to your computer and you are ready to go !
Configuring your DAW :
Nuances controller is a MIDI device, your DAW will se it as any MIDI keyboard.
Please note : the Nuances controller isn’t a DAW control surface.
Most DAW will use any connected MIDI input controller when recording a MIDI track and you should be able to start working with it as soon as you connect it to your computer.
If you have any issue with your specific DAW, the procedure to add the Nuances controller is the same as adding any Midi keyboard. (Detailed instructions for specific DAW below).
All CC values sent by the Nuances controller are sent on Midi channel 1.
Switching Faders banks :
The Nuances controller Mk2 has 3 faders Banks Presets.
A simple short press on the switch will change to the next preset.
After a power cycle, the Nuances controller Mk2 always load Preset bank 1
Choosing Midi CC :
For Nuances controller Mk2 the process is the same for each Faders Banks
Logic Pro
There isn’t any specific configuration to do with Logic. Just check that Your Nuances controller is selected in :
Logic Pro/Settings/Midi…

Protools
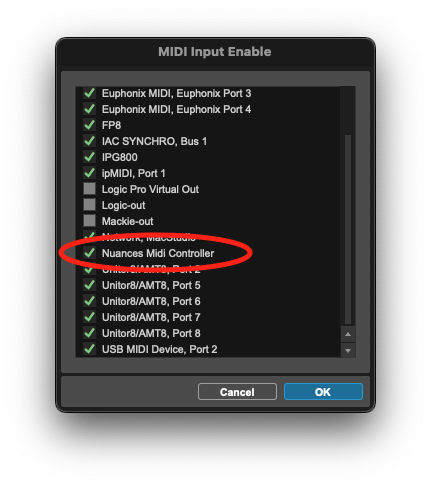
There isn’t any specific configuration to do with Protools. Just check that Your Nuances controller is selected in :
Setup/MIDI/Midi Input Devices …
Cubase
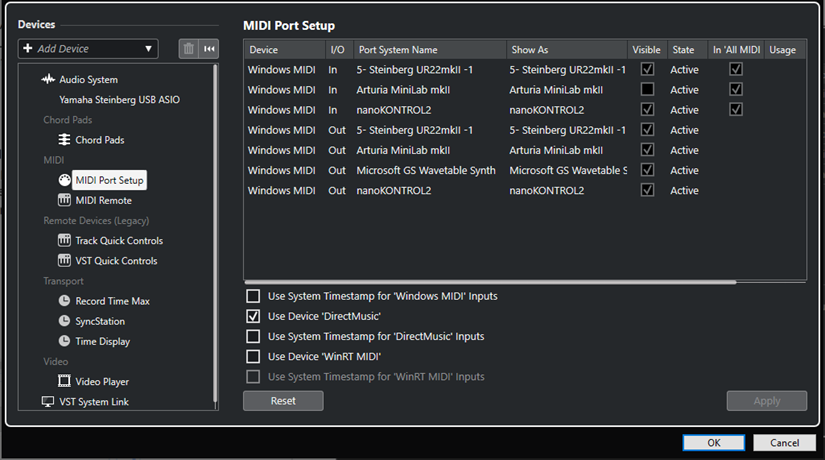
To use a MIDI device in Cubase, it must be Active in MID Port Setup :
Setup/Studio Setup
Then select MID Port Setup in the left-hand panel
Nuances Midi Controller must be “Active“
Digital Performer
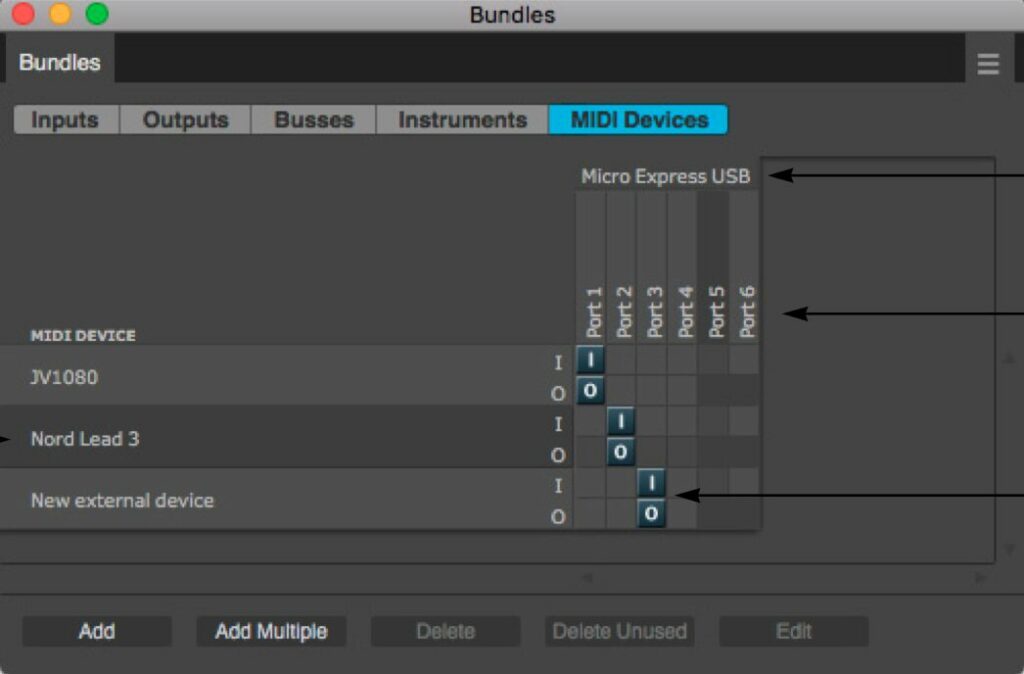
Your Nuances controller has to be selected on the MIDI Studio window go to :
Studio/Bundles
Click the MIDI Studio window
Your Nuances controller should appear above the I/O grid in the same fashion as the MIDI interface shown in the screenshot below.
No additional I/O configuration is required.
Ableton Live
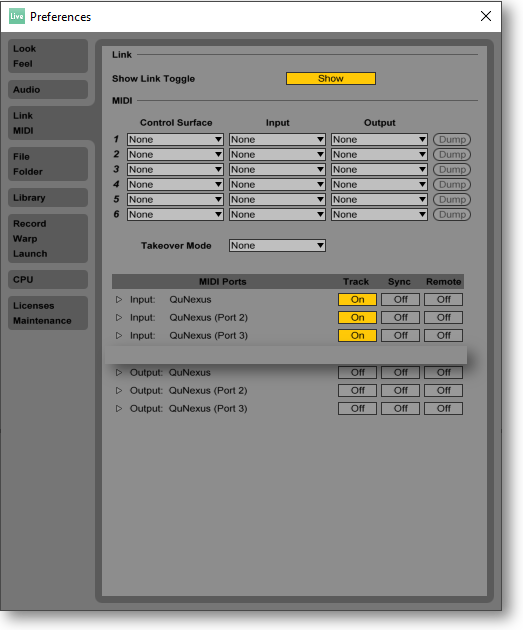
Go to the Options tab, click Preferences, then click the Link/MIDI tab on the left.
Locate your Nuances controller in the Input section and turn the Track button to ON to enable it.
Move a fader to confirm you’re getting MIDI signal.
You’re done !
Studio One
Add the Nuances controller as a new keyboard
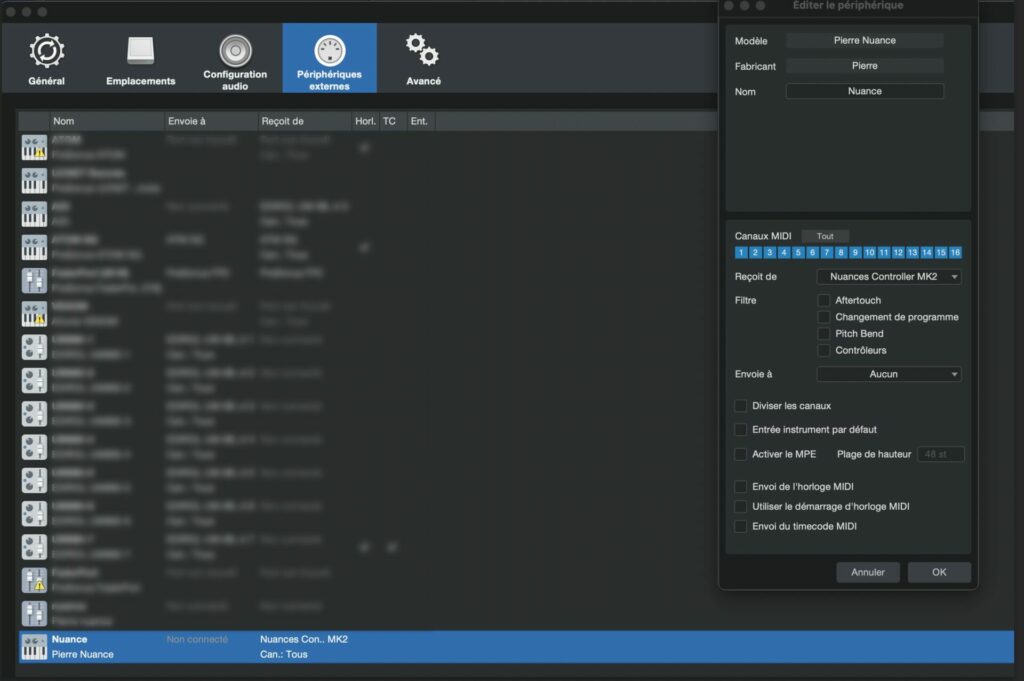
For other DAW, please consult your specific DAW user guide
Safety Instructions :
Clean the unit only with a dry, soft cloth.
Do not install or operate the product near heat sources such as radiators, stoves, or other equipment that produces heat.
This equipment must only be connected to USB 2.0 compatible ports.
Unplug the product during lightning storms or when unused for long periods of time.
Servicing is required if the unit has been damaged in any way, including:
- being dropped,
- liquid spilled on it,
- exposure to rain or moisture,
- debris entering the unit,
- or if it does not operate normally.
Do not place naked flames (such as lit candles) on or near the device.